그리드뷰(gridview) 이미지에 이벤트 넣기

프로그래밍/Android (Java)|2015. 11. 4. 10:42
반응형

그리드뷰 중에 이미지를 표현하는 곳이 있습니다.


ImageView sysdocu_image = (ImageView) convertView.findViewById(R.id.ColPhoto);

이런식으로.. 이 하단에 아래 코드를 입력하면 됩니다.


sysdocu_image.setOnClickListener(new OnClickListener() {
@Override
public void onClick(View v) {
    Intent intent = new Intent(ListActivity.this, VideoViewActivity.class);    // intent 변경 예(2줄). 다른 이벤트를 넣어도 됩니다.
    startActivity(intent);
    }
});


그리고 .java 파일 상단에 아래 항목을 잊지말고 추가해줍니다.


import android.view.View.OnClickListener;


* 참고

setOnclickListener 에서 상위 클래스의 변수를 가져오려고 할때 변수에 final 설정을 해주면 됩니다.


반응형

댓글()

액티비티 간 String 전송 (데이터 전송)

프로그래밍/Android (Java)|2015. 11. 3. 15:20
반응형
액티비티간에 자료를 전송해 주고 싶은 경우가 있다.

나같은 경우는 String형의 값을 전달해 주고 싶었다. 

이럴경우 쓰는 방법.


자료를 전송하고자 하는 액티비티에서 다음과 같이 해당 액티비티를 불러온다.

Intent intentAA = new Intent(this, Connect.class);    //Connect.java가 있어야한다. (액티비티)
intentAA.putExtra("key", "원하는 문자열 값");             //key는 해당 문자열을 알기 위한 값 받는 액티비티는 이 key를 통해서 문자열을 검색.
startActivity(intentAA);

--------------------------------------------------------------------------------------------

Connect 액티비티에서 문자열 값을 받는 방법.

String STR = getIntent().getStringExtra("key");                   //인텐트의 key값을 통해 해당 String을 받는다.
Toast.makeText(this, STR, Toast.LENGTH_LONG).show();   //토스트 기능으로 확인해보자.


[출처] http://egloos.zum.com/hiiq/v/1877208


안될경우 아래와 같이 액티비티명을 기재할것. 그리고 Toast 작성 위치도 중요

Toast.makeText(SubActivity.this, STR, Toast.LENGTH_LONG).show();


반응형

댓글()

Android (ListView/GridView) get Result from Web Server and Paging Pagination

프로그래밍/Android (Java)|2015. 11. 3. 08:41
반응형

Android (ListView/GridView) get Result from Web Server and Paging Pagination บทความการเขียน Androidเพื่ออ่านข้อมูลจาก Web Server ที่อยู่ในรูปแบบของ JSON และเมื่อได้ JSON ที่ส่งมาทั้งหมดในครั้งเดียวมาจาก Web Server ก็จะนำข้อมูลเหล่านั้นมาจัดการแบ่งหน้าข้อมูล โดยแปลงข้อมูลที่ได้ให้อยู่ในรูปแบบ ArrayList และแสดงข้อมูลใน ArrayList ตามIndex ทีก่ำหนดในหน้านั้น ๆ ซึ่งวิธีนี้จะติดต่อกับ Web Server เพียงครั้งเดียว แต่จะใช้การเขียน function เพื่อจัดการกับข้อมูลที่ได้ ให้แสดงผลบน ListView หรือ GridView เป็นหน้า ๆ ตามต้องการ

Android (ListView/GridView) get Result from Web Server and Paging Pagination


จากภาพประกอบ แสดงการอ่านข้อมูล Web Server และการแปลงค่า JSON แสดงข้อมูลแบ่งหลาย ๆ หน้าบน ListView และ GridView

AndroidManifest.xml

1.<uses-permission android:name="android.permission.INTERNET" />


ในการเขียน Android เพื่อติดต่อกับ Internet จะต้องกำหนด Permission ในส่วนนี้ด้วยทุกครั้ง

บทความที่เกี่ยวข้อง


Web Server (PHP and MySQL)

MySQL Database

CREATE TABLE `images` (
`ImageID` int(2) NOT NULL auto_increment,
`ItemID` varchar(50) NOT NULL,
`ImagePath` varchar(50) NOT NULL,
PRIMARY KEY (`ImageID`)
) ENGINE=MyISAM DEFAULT CHARSET=utf8 AUTO_INCREMENT=31 ;

-- 
-- Dumping data for table `images`
-- 

INSERT INTO `images` VALUES (1, 'Item 01', 'http://www.thaicreate.com/android/images/img01.gif');
INSERT INTO `images` VALUES (2, 'Item 02', 'http://www.thaicreate.com/android/images/img02.gif');
INSERT INTO `images` VALUES (3, 'Item 03', 'http://www.thaicreate.com/android/images/img03.gif');
INSERT INTO `images` VALUES (4, 'Item 04', 'http://www.thaicreate.com/android/images/img04.gif');
INSERT INTO `images` VALUES (5, 'Item 05', 'http://www.thaicreate.com/android/images/img05.gif');
INSERT INTO `images` VALUES (6, 'Item 06', 'http://www.thaicreate.com/android/images/img06.gif');
INSERT INTO `images` VALUES (7, 'Item 07', 'http://www.thaicreate.com/android/images/img07.gif');
INSERT INTO `images` VALUES (8, 'Item 08', 'http://www.thaicreate.com/android/images/img08.gif');
INSERT INTO `images` VALUES (9, 'Item 09', 'http://www.thaicreate.com/android/images/img09.gif');
INSERT INTO `images` VALUES (10, 'Item 10', 'http://www.thaicreate.com/android/images/img10.gif');
INSERT INTO `images` VALUES (11, 'Item 11', 'http://www.thaicreate.com/android/images/img11.gif');
INSERT INTO `images` VALUES (12, 'Item 12', 'http://www.thaicreate.com/android/images/img12.gif');
INSERT INTO `images` VALUES (13, 'Item 13', 'http://www.thaicreate.com/android/images/img13.gif');
INSERT INTO `images` VALUES (14, 'Item 14', 'http://www.thaicreate.com/android/images/img14.gif');
INSERT INTO `images` VALUES (15, 'Item 15', 'http://www.thaicreate.com/android/images/img15.gif');
INSERT INTO `images` VALUES (16, 'Item 16', 'http://www.thaicreate.com/android/images/img16.gif');
INSERT INTO `images` VALUES (17, 'Item 17', 'http://www.thaicreate.com/android/images/img17.gif');
INSERT INTO `images` VALUES (18, 'Item 18', 'http://www.thaicreate.com/android/images/img18.gif');
INSERT INTO `images` VALUES (19, 'Item 19', 'http://www.thaicreate.com/android/images/img19.gif');
INSERT INTO `images` VALUES (20, 'Item 20', 'http://www.thaicreate.com/android/images/img20.gif');
INSERT INTO `images` VALUES (21, 'Item 21', 'http://www.thaicreate.com/android/images/img21.gif');
INSERT INTO `images` VALUES (22, 'Item 22', 'http://www.thaicreate.com/android/images/img22.gif');
INSERT INTO `images` VALUES (23, 'Item 23', 'http://www.thaicreate.com/android/images/img23.gif');
INSERT INTO `images` VALUES (24, 'Item 24', 'http://www.thaicreate.com/android/images/img24.gif');
INSERT INTO `images` VALUES (25, 'Item 25', 'http://www.thaicreate.com/android/images/img25.gif');
INSERT INTO `images` VALUES (26, 'Item 26', 'http://www.thaicreate.com/android/images/img26.gif');
INSERT INTO `images` VALUES (27, 'Item 27', 'http://www.thaicreate.com/android/images/img27.gif');
INSERT INTO `images` VALUES (28, 'Item 28', 'http://www.thaicreate.com/android/images/img28.gif');
INSERT INTO `images` VALUES (29, 'Item 29', 'http://www.thaicreate.com/android/images/img29.gif');
INSERT INTO `images` VALUES (30, 'Item 30', 'http://www.thaicreate.com/android/images/img30.gif');


getAllData.php

01.<?php
02.$objConnect = mysql_connect("localhost","root","root");
03.$objDB = mysql_select_db("mydatabase");
04. 
05.$strSQL "SELECT * FROM images WHERE 1  ";
06.$objQuery = mysql_query($strSQL);
07.$intNumField = mysql_num_fields($objQuery);
08.$resultArray array();
09.while($obResult = mysql_fetch_array($objQuery))
10.{
11.$arrCol array();
12.for($i=0;$i<$intNumField;$i++)
13.{
14.$arrCol[mysql_field_name($objQuery,$i)] = $obResult[$i];
15.}
16.array_push($resultArray,$arrCol);
17.}
18. 
19.mysql_close($objConnect);
20. 
21.echo json_encode($resultArray);
22.?>


จาก Code ของ PHP จะทำการ return ค่า JSON ไปยัง Client ได้ค่าดังนี้

JSON Result

[{"ImageID":"1","ItemID":"Item 01","ImagePath":"http://www.thaicreate.com/android/images/img01.gif"}
,{"ImageID":"2","ItemID":"Item 02","ImagePath":"http://www.thaicreate.com/android/images/img02.gif"}
,{"ImageID":"3","ItemID":"Item 03","ImagePath":"http://www.thaicreate.com/android/images/img03.gif"}
,{"ImageID":"4","ItemID":"Item 04","ImagePath":"http://www.thaicreate.com/android/images/img04.gif"}
,{"ImageID":"5","ItemID":"Item 05","ImagePath":"http://www.thaicreate.com/android/images/img05.gif"}
,{"ImageID":"6","ItemID":"Item 06","ImagePath":"http://www.thaicreate.com/android/images/img06.gif"}
,{"ImageID":"7","ItemID":"Item 07","ImagePath":"http://www.thaicreate.com/android/images/img07.gif"}
,{"ImageID":"8","ItemID":"Item 08","ImagePath":"http://www.thaicreate.com/android/images/img08.gif"}
,{"ImageID":"9","ItemID":"Item 09","ImagePath":"http://www.thaicreate.com/android/images/img09.gif"}
,{"ImageID":"10","ItemID":"Item 10","ImagePath":"http://www.thaicreate.com/android/images/img10.gif"}
,{"ImageID":"11","ItemID":"Item 11","ImagePath":"http://www.thaicreate.com/android/images/img11.gif"}
,{"ImageID":"12","ItemID":"Item 12","ImagePath":"http://www.thaicreate.com/android/images/img12.gif"}
,{"ImageID":"13","ItemID":"Item 13","ImagePath":"http://www.thaicreate.com/android/images/img13.gif"}
,{"ImageID":"14","ItemID":"Item 14","ImagePath":"http://www.thaicreate.com/android/images/img14.gif"}
,{"ImageID":"15","ItemID":"Item 15","ImagePath":"http://www.thaicreate.com/android/images/img15.gif"}
,{"ImageID":"16","ItemID":"Item 16","ImagePath":"http://www.thaicreate.com/android/images/img16.gif"}
,{"ImageID":"17","ItemID":"Item 17","ImagePath":"http://www.thaicreate.com/android/images/img17.gif"}
,{"ImageID":"18","ItemID":"Item 18","ImagePath":"http://www.thaicreate.com/android/images/img18.gif"}
,{"ImageID":"19","ItemID":"Item 19","ImagePath":"http://www.thaicreate.com/android/images/img19.gif"}
,{"ImageID":"20","ItemID":"Item 20","ImagePath":"http://www.thaicreate.com/android/images/img20.gif"}
,{"ImageID":"21","ItemID":"Item 21","ImagePath":"http://www.thaicreate.com/android/images/img21.gif"}
,{"ImageID":"22","ItemID":"Item 22","ImagePath":"http://www.thaicreate.com/android/images/img22.gif"}
,{"ImageID":"23","ItemID":"Item 23","ImagePath":"http://www.thaicreate.com/android/images/img23.gif"}
,{"ImageID":"24","ItemID":"Item 24","ImagePath":"http://www.thaicreate.com/android/images/img24.gif"}
,{"ImageID":"25","ItemID":"Item 25","ImagePath":"http://www.thaicreate.com/android/images/img25.gif"}
,{"ImageID":"26","ItemID":"Item 26","ImagePath":"http://www.thaicreate.com/android/images/img26.gif"}
,{"ImageID":"27","ItemID":"Item 27","ImagePath":"http://www.thaicreate.com/android/images/img27.gif"}
,{"ImageID":"28","ItemID":"Item 28","ImagePath":"http://www.thaicreate.com/android/images/img28.gif"}
,{"ImageID":"29","ItemID":"Item 29","ImagePath":"http://www.thaicreate.com/android/images/img29.gif"}
,{"ImageID":"30","ItemID":"Item 30","ImagePath":"http://www.thaicreate.com/android/images/img30.gif"}]


JSON Code ที่ถูกส่งไปยัง Android

จาก Code ของ JSON จะเห็นว่า JSON จะถุกส่งมาครั้งเดียว โดยถ้าข้อมูลมาหลายร้อยรายการ ก็จะถูกส่งกลับมายัง Web Serverทั้งหมด ทำให้ลดอัตรา Transfer การติดต่อกับ Web Server 

แต่ถ้าต้อมูลมีหลายหมื่นหรือแสน Record การใช้วิธีนี้จะเป็นปัญหาอย่างยิ่ง เพราะการที่จะส่งข้อมูลขนาดนั้นมายัง Android Clientย่อมเป็นเรื่องที่ยาก เพราะฉะนั้น ถ้าข้อมูลมามากหลายหมื่นหรือแสนรายการควรจะให้เป็นหน้าที่ของ PHP กับ MySQL ที่จะจัดการกับข้อมูล และทำการอ่านข้อมูลมาแสดงผลเฉพาะในหน้านั้น ๆ ที่ต้องการ สามารถอ่านได้ที่บทความนี้

Android Split Page Data (Next,Previous) result from PHP and MySQL


Android Project

Example 1 การแสดงผลและแบ่งหน้าข้อมูลจาก Web Server บน ListView Widgets

โครงสร้างของไฟล์ประกอบด้วย 3 ไฟล์คือ MainActivity.java, activity_main.xml และ activity_column.xml 

Android (ListView/GridView) get Result from Web Server and Paging Pagination

activity_main.xml

01.<TableLayout xmlns:android="http://schemas.android.com/apk/res/android"
02.android:id="@+id/tableLayout1"
03.android:layout_width="fill_parent"
04.android:layout_height="fill_parent">
05. 
06.<TableRow
07.android:id="@+id/tableRow1"
08.android:layout_width="wrap_content"
09.android:layout_height="wrap_content" >
10. 
11.<TextView
12.android:id="@+id/textView1"
13.android:layout_width="wrap_content"
14.android:layout_height="wrap_content"
15.android:gravity="center"
16.android:text="ListView Pagination : "
17.android:layout_span="1" />
18. 
19.<Button
20.android:id="@+id/btnPre"
21.android:layout_width="wrap_content"
22.android:layout_height="wrap_content"
23.android:text="&lt;&lt; Prev" />
24. 
25. 
26.<Button
27.android:id="@+id/btnNext"
28.android:layout_width="wrap_content"
29.android:layout_height="wrap_content"
30.android:text="Next >>" />
31. 
32.</TableRow>
33. 
34.<View
35.android:layout_height="1dip"
36.android:background="#CCCCCC" />
37. 
38.<LinearLayout
39.android:orientation="horizontal"
40.android:layout_width="fill_parent"
41.android:layout_height="wrap_content"
42.android:layout_weight="0.1">  
43. 
44.<ListView
45.android:id="@+id/listView1"
46.android:layout_width="match_parent"
47.android:layout_height="wrap_content">
48.</ListView>
49. 
50.</LinearLayout>
51. 
52.<View
53.android:layout_height="1dip"
54.android:background="#CCCCCC" />
55. 
56.<LinearLayout
57.android:id="@+id/LinearLayout1"
58.android:layout_width="wrap_content"
59.android:layout_height="wrap_content"
60.android:padding="5dip" >
61. 
62.<TextView
63.android:id="@+id/textView2"
64.android:layout_width="wrap_content"
65.android:layout_height="wrap_content"
66.android:text="By.. ThaiCreate.Com" />
67. 
68.</LinearLayout>
69. 
70.</TableLayout>


Android (ListView/GridView) get Result from Web Server and Paging Pagination

activity_column.xml

01.<TableLayout xmlns:android="http://schemas.android.com/apk/res/android"
02.android:id="@+id/tableLayout1"
03.android:layout_width="fill_parent"
04.android:layout_height="fill_parent" >
05. 
06.<TableRow
07.android:layout_width="wrap_content"
08.android:layout_height="wrap_content" >
09. 
10.<ImageView
11.android:id="@+id/ColImagePath"
12.android:layout_width="wrap_content"
13.android:layout_height="wrap_content"
14./>
15. 
16.<TextView
17.android:id="@+id/ColImageID"
18.android:text="Column 1" />
19. 
20.<TextView
21.android:id="@+id/ColItemID"
22.android:text="Column 2" />
23. 
24.</TableRow>
25. 
26. 
27.</TableLayout>


MainActivity.java

001.package com.myapp;
002. 
003.import java.io.BufferedInputStream;
004.import java.io.BufferedOutputStream;
005.import java.io.BufferedReader;
006.import java.io.ByteArrayOutputStream;
007.import java.io.Closeable;
008.import java.io.IOException;
009.import java.io.InputStream;
010.import java.io.InputStreamReader;
011.import java.io.OutputStream;
012.import java.net.URL;
013.import java.util.ArrayList;
014.import java.util.HashMap;
015. 
016.import org.apache.http.HttpEntity;
017.import org.apache.http.HttpResponse;
018.import org.apache.http.StatusLine;
019.import org.apache.http.client.ClientProtocolException;
020.import org.apache.http.client.HttpClient;
021.import org.apache.http.client.methods.HttpGet;
022.import org.apache.http.impl.client.DefaultHttpClient;
023.import org.json.JSONArray;
024.import org.json.JSONException;
025.import org.json.JSONObject;
026. 
027.import android.app.Activity;
028.import android.content.Context;
029.import android.graphics.Bitmap;
030.import android.graphics.BitmapFactory;
031.import android.os.AsyncTask;
032.import android.os.Bundle;
033.import android.util.Log;
034.import android.view.LayoutInflater;
035.import android.view.View;
036.import android.view.ViewGroup;
037.import android.view.Window;
038.import android.widget.BaseAdapter;
039.import android.widget.Button;
040.import android.widget.ImageView;
041.import android.widget.ListView;
042.import android.widget.TextView;
043. 
044. 
045.public class MainActivity extends Activity  {
046. 
047.private ListView lstView;
048.private ImageAdapter imageAdapter;
049. 
050.public int currentPage = 1;
051.public int TotalPage = 0;
052. 
053.public Button btnNext;
054.public Button btnPre;
055. 
056.ArrayList<HashMap<String, Object>> MyArrList = new ArrayList<HashMap<String, Object>>();
057. 
058.@Override
059.public void onCreate(Bundle savedInstanceState) {
060.super.onCreate(savedInstanceState);       
061.// ProgressBar
062.requestWindowFeature(Window.FEATURE_INDETERMINATE_PROGRESS);
063. 
064.setContentView(R.layout.activity_main);
065. 
066.// ListView and imageAdapter
067.lstView = (ListView) findViewById(R.id.listView1);
068.lstView.setClipToPadding(false);
069.imageAdapter = new ImageAdapter(getApplicationContext());
070.lstView.setAdapter(imageAdapter);
071. 
072. 
073.// Next
074.btnNext = (Button) findViewById(R.id.btnNext);
075.// Perform action on click
076.btnNext.setOnClickListener(new View.OnClickListener() {
077.public void onClick(View v) {
078.currentPage = currentPage + 1;
079.ShowData();
080.}
081.});
082. 
083.// Previous
084.btnPre = (Button) findViewById(R.id.btnPre);
085.// Perform action on click
086.btnPre.setOnClickListener(new View.OnClickListener() {
087.public void onClick(View v) {
088.currentPage = currentPage - 1;
089.ShowData();
090.}
091.});
092. 
093.// Show first load
094.ShowData();
095. 
096.}
097. 
098.public void ShowData()
099.{
100.btnNext.setEnabled(false);
101.btnPre.setEnabled(false);
102. 
103.setProgressBarIndeterminateVisibility(true);
104.new LoadContentFromServer().execute();
105.}
106. 
107. 
108.class LoadContentFromServer extends AsyncTask<Object, Integer, Object> {
109. 
110.@Override
111.protected Object doInBackground(Object... params) {
112. 
114. 
115.JSONArray data;
116.try {
117.data = new JSONArray(getJSONUrl(url));
118. 
119.MyArrList = new ArrayList<HashMap<String, Object>>();
120.HashMap<String, Object> map;
121. 
122./*
123.* TotalRows = Show for total rows
124.* TotalPage = Show for total page
125.*/
126. 
127.int displayPerPage = 7;   // Per Page
128.int TotalRows = data.length();
129.int indexRowStart = ((displayPerPage*currentPage)-displayPerPage);
130. 
131.if(TotalRows<=displayPerPage)
132.{
133.TotalPage =1;
134.}
135.else if((TotalRows % displayPerPage)==0)
136.{
137.TotalPage =(TotalRows/displayPerPage) ;
138.}
139.else
140.{
141.TotalPage =(TotalRows/displayPerPage)+1;
142.TotalPage = (int)TotalPage;
143.}
144.int indexRowEnd = displayPerPage * currentPage;
145.if(indexRowEnd > TotalRows)
146.{
147.indexRowEnd = TotalRows;
148.}
149. 
150.for(int i = indexRowStart; i < indexRowEnd; i++){
151.JSONObject c = data.getJSONObject(i);
152.map = new HashMap<String, Object>();
153.map.put("ImageID", (String)c.getString("ImageID"));
154.map.put("ItemID", (String)c.getString("ItemID"));
155. 
156.// Thumbnail Get ImageBitmap To Object
157.map.put("ImagePath", (String)c.getString("ImagePath"));
158.Bitmap newBitmap = loadBitmap(c.getString("ImagePath"));
159.map.put("ImagePathBitmap", newBitmap);
160. 
161.MyArrList.add(map);
162. 
163.publishProgress(i);
164. 
165.}
166. 
167. 
168.catch (JSONException e) {
169.// TODO Auto-generated catch block
170.e.printStackTrace();
171.}
172. 
173.return null;
174.}
175. 
176.@Override
177.public void onProgressUpdate(Integer... progress) {
178.imageAdapter.notifyDataSetChanged();
179.}
180. 
181.@Override
182.protected void onPostExecute(Object result) {
183. 
184.// Disabled Button Next
185.if(currentPage >= TotalPage)
186.{
187.btnNext.setEnabled(false);
188.}
189.else
190.{
191.btnNext.setEnabled(true);
192.}
193. 
194.// Disabled Button Previos
195.if(currentPage <= 1)
196.{
197.btnPre.setEnabled(false);
198.}
199.else
200.{
201.btnPre.setEnabled(true);
202.}
203. 
204.setProgressBarIndeterminateVisibility(false); // When Finish
205.}
206.}  
207. 
208. 
209.class ImageAdapter extends BaseAdapter {
210. 
211.private Context mContext;
212. 
213.public ImageAdapter(Context context) {
214.mContext = context;
215.}
216. 
217.public int getCount() {
218.return MyArrList.size();   
219.}
220. 
221.public Object getItem(int position) {
222.return MyArrList.get(position);
223.}
224. 
225.public long getItemId(int position) {
226.return position;
227.}
228. 
229.public View getView(int position, View convertView, ViewGroup parent) {
230.// TODO Auto-generated method stub
231. 
232.LayoutInflater inflater = (LayoutInflater) mContext
233..getSystemService(Context.LAYOUT_INFLATER_SERVICE);
234. 
235. 
236.if (convertView == null) {
237.convertView = inflater.inflate(R.layout.activity_column, null);
238.}
239. 
240.// ColImagePath
241.ImageView imageView = (ImageView) convertView.findViewById(R.id.ColImagePath);
242.imageView.getLayoutParams().height = 60;
243.imageView.getLayoutParams().width = 60;
244.imageView.setPadding(5555);
245.imageView.setScaleType(ImageView.ScaleType.CENTER_CROP);
246.try
247.{
248.imageView.setImageBitmap((Bitmap)MyArrList.get(position).get("ImagePathBitmap"));
249.catch (Exception e) {
250.// When Error
251.imageView.setImageResource(android.R.drawable.ic_menu_report_image);
252.}
253. 
254.// ColImageID
255.TextView txtImgID = (TextView) convertView.findViewById(R.id.ColImageID);
256.txtImgID.setPadding(10000);
257.txtImgID.setText("ID : " + MyArrList.get(position).get("ImageID").toString());
258. 
259.// ColItemID
260.TextView txtItemID = (TextView) convertView.findViewById(R.id.ColItemID);
261.txtItemID.setPadding(50000);
262.txtItemID.setText("Item : " + MyArrList.get(position).get("ItemID").toString());   
263. 
264.return convertView;
265. 
266.}
267. 
268.}
269. 
270./*** Get JSON Code from URL ***/
271.public String getJSONUrl(String url) {
272.StringBuilder str = new StringBuilder();
273.HttpClient client = new DefaultHttpClient();
274.HttpGet httpGet = new HttpGet(url);
275.try {
276.HttpResponse response = client.execute(httpGet);
277.StatusLine statusLine = response.getStatusLine();
278.int statusCode = statusLine.getStatusCode();
279.if (statusCode == 200) { // Download OK
280.HttpEntity entity = response.getEntity();
281.InputStream content = entity.getContent();
282.BufferedReader reader = new BufferedReader(new InputStreamReader(content));
283.String line;
284.while ((line = reader.readLine()) != null) {
285.str.append(line);
286.}
287.else {
288.Log.e("Log""Failed to download file..");
289.}
290.catch (ClientProtocolException e) {
291.e.printStackTrace();
292.catch (IOException e) {
293.e.printStackTrace();
294.}
295.return str.toString();
296.}
297. 
298./***** Get Image Resource from URL (Start) *****/
299.private static final String TAG = "Image";
300.private static final int IO_BUFFER_SIZE = 4 1024;
301.public static Bitmap loadBitmap(String url) {
302.Bitmap bitmap = null;
303.InputStream in = null;
304.BufferedOutputStream out = null;
305. 
306.try {
307.in = new BufferedInputStream(new URL(url).openStream(), IO_BUFFER_SIZE);
308. 
309.final ByteArrayOutputStream dataStream = new ByteArrayOutputStream();
310.out = new BufferedOutputStream(dataStream, IO_BUFFER_SIZE);
311.copy(in, out);
312.out.flush();
313. 
314.final byte[] data = dataStream.toByteArray();
315.BitmapFactory.Options options = new BitmapFactory.Options();
316.//options.inSampleSize = 1;
317. 
318.bitmap = BitmapFactory.decodeByteArray(data, 0, data.length,options);
319.catch (IOException e) {
320.Log.e(TAG, "Could not load Bitmap from: " + url);
321.finally {
322.closeStream(in);
323.closeStream(out);
324.}
325. 
326.return bitmap;
327.}
328. 
329.private static void closeStream(Closeable stream) {
330.if (stream != null) {
331.try {
332.stream.close();
333.catch (IOException e) {
334.android.util.Log.e(TAG, "Could not close stream", e);
335.}
336.}
337.}
338. 
339.private static void copy(InputStream in, OutputStream out) throws IOException {
340.byte[] b = new byte[IO_BUFFER_SIZE];
341.int read;
342.while ((read = in.read(b)) != -1) {
343.out.write(b, 0, read);
344.}
345.}
346./***** Get Image Resource from URL (End) *****/
347. 
348.}


Screenshot

Android (ListView/GridView) get Result from Web Server and Paging Pagination

กำลังโหลดและแสดงข้อมูลจาก Web Server และจัดการกับข้อมูลโดยการแบ่งการแสดงผลออกเป็นหลายหน้า

Android (ListView/GridView) get Result from Web Server and Paging Pagination

ทดสอบคลิกไปที่ Next >> เพื่อไปยังหน้าถัดไป

Android (ListView/GridView) get Result from Web Server and Paging Pagination

ในการเปลี่ยนแปลงหน้าทุกครั้งจะมีการใช้ ProgressBar ควบคุมการทำงาน เพื่อป้องกันโปรแกรมค้าง

Android (ListView/GridView) get Result from Web Server and Paging Pagination

สามารถคลิก << Prev หรือ Next >> เพื่อดูรายการข้อมูลในหน้าต่าง ๆ 


Example 2 การแสดงผลและแบ่งหน้าข้อมูลจาก Web Server บน GridView Widgets

โครงสร้างของไฟล์ประกอบด้วย 3 ไฟล์คือ MainActivity.java, activity_main.xml และ activity_column.xml 

Android (ListView/GridView) get Result from Web Server and Paging Pagination

activity_main.xml

01.<TableLayout xmlns:android="http://schemas.android.com/apk/res/android"
02.android:id="@+id/tableLayout1"
03.android:layout_width="fill_parent"
04.android:layout_height="fill_parent">
05. 
06.<TableRow
07.android:id="@+id/tableRow1"
08.android:layout_width="wrap_content"
09.android:layout_height="wrap_content" >
10. 
11.<TextView
12.android:id="@+id/textView1"
13.android:layout_width="wrap_content"
14.android:layout_height="wrap_content"
15.android:gravity="center"
16.android:text="GridView Pagination : "
17.android:layout_span="1" />
18. 
19.<Button
20.android:id="@+id/btnPre"
21.android:layout_width="wrap_content"
22.android:layout_height="wrap_content"
23.android:text="&lt;&lt; Prev" />
24. 
25. 
26.<Button
27.android:id="@+id/btnNext"
28.android:layout_width="wrap_content"
29.android:layout_height="wrap_content"
30.android:text="Next >>" />
31. 
32.</TableRow>
33. 
34.<View
35.android:layout_height="1dip"
36.android:background="#CCCCCC" />
37. 
38.<LinearLayout
39.android:orientation="horizontal"
40.android:layout_width="fill_parent"
41.android:layout_height="wrap_content"
42.android:layout_weight="0.1">  
43. 
44.<GridView
45.android:id="@+id/gridView1"
46.android:layout_width="match_parent"
47.android:layout_height="wrap_content"
48.android:numColumns="3" >
49.</GridView>
50. 
51.</LinearLayout>
52. 
53.<View
54.android:layout_height="1dip"
55.android:background="#CCCCCC" />
56. 
57.<LinearLayout
58.android:id="@+id/LinearLayout1"
59.android:layout_width="wrap_content"
60.android:layout_height="wrap_content"
61.android:padding="5dip" >
62. 
63.<TextView
64.android:id="@+id/textView2"
65.android:layout_width="wrap_content"
66.android:layout_height="wrap_content"
67.android:text="By.. ThaiCreate.Com" />
68. 
69.</LinearLayout>
70. 
71.</TableLayout>


Android (ListView/GridView) get Result from Web Server and Paging Pagination

activity_column.xml

01.<?xml version="1.0" encoding="utf-8"?>
02.<LinearLayout xmlns:android="http://schemas.android.com/apk/res/android"
03.android:orientation="horizontal"
04.android:layout_width="fill_parent"
05.android:layout_height="fill_parent">
06.<ImageView
07.android:id="@+id/ColPhoto"
08.android:layout_width="50dp"
09.android:layout_height="50dp"
10./>
11.<LinearLayout
12.android:orientation="vertical"
13.android:layout_width="fill_parent"
14.android:layout_height="fill_parent">
15.<LinearLayout
16.android:orientation="horizontal"
17.android:layout_width="wrap_content"
18.android:layout_height="wrap_content">
19. 
20.<TextView android:id="@+id/ColImageID"
21.android:layout_width="wrap_content"
22.android:layout_height="wrap_content"
23.android:text="ImageID"
24./>
25.</LinearLayout>
26.<LinearLayout
27.android:orientation="horizontal"
28.android:layout_width="wrap_content"
29.android:layout_height="wrap_content">
30. 
31.<TextView android:id="@+id/ColItemID"
32.android:layout_width="wrap_content"
33.android:layout_height="wrap_content"
34.android:text="ItemID"
35./>
36. 
37.</LinearLayout>
38.</LinearLayout>
39.</LinearLayout>


MainActivity.java

001.package com.myapp;
002. 
003.import java.io.BufferedInputStream;
004.import java.io.BufferedOutputStream;
005.import java.io.BufferedReader;
006.import java.io.ByteArrayOutputStream;
007.import java.io.Closeable;
008.import java.io.IOException;
009.import java.io.InputStream;
010.import java.io.InputStreamReader;
011.import java.io.OutputStream;
012.import java.net.URL;
013.import java.util.ArrayList;
014.import java.util.HashMap;
015. 
016.import org.apache.http.HttpEntity;
017.import org.apache.http.HttpResponse;
018.import org.apache.http.StatusLine;
019.import org.apache.http.client.ClientProtocolException;
020.import org.apache.http.client.HttpClient;
021.import org.apache.http.client.methods.HttpGet;
022.import org.apache.http.impl.client.DefaultHttpClient;
023.import org.json.JSONArray;
024.import org.json.JSONException;
025.import org.json.JSONObject;
026. 
027.import android.app.Activity;
028.import android.content.Context;
029.import android.graphics.Bitmap;
030.import android.graphics.BitmapFactory;
031.import android.os.AsyncTask;
032.import android.os.Bundle;
033.import android.util.Log;
034.import android.view.LayoutInflater;
035.import android.view.View;
036.import android.view.ViewGroup;
037.import android.view.Window;
038.import android.widget.BaseAdapter;
039.import android.widget.Button;
040.import android.widget.GridView;
041.import android.widget.ImageView;
042.import android.widget.TextView;
043. 
044. 
045.public class MainActivity extends Activity  {
046. 
047.private GridView gridV;
048.private ImageAdapter imageAdapter;
049. 
050.public int currentPage = 1;
051.public int TotalPage = 0;
052. 
053.public Button btnNext;
054.public Button btnPre;
055. 
056.ArrayList<HashMap<String, Object>> MyArrList = new ArrayList<HashMap<String, Object>>();
057. 
058.@Override
059.public void onCreate(Bundle savedInstanceState) {
060.super.onCreate(savedInstanceState);       
061.// ProgressBar
062.requestWindowFeature(Window.FEATURE_INDETERMINATE_PROGRESS);
063. 
064.setContentView(R.layout.activity_main);
065. 
066.// GridView and imageAdapter
067.gridV = (GridView) findViewById(R.id.gridView1);
068.gridV.setClipToPadding(false);
069.imageAdapter = new ImageAdapter(getApplicationContext());
070.gridV.setAdapter(imageAdapter);
071. 
072. 
073.// Next
074.btnNext = (Button) findViewById(R.id.btnNext);
075.// Perform action on click
076.btnNext.setOnClickListener(new View.OnClickListener() {
077.public void onClick(View v) {
078.currentPage = currentPage + 1;
079.ShowData();
080.}
081.});
082. 
083.// Previous
084.btnPre = (Button) findViewById(R.id.btnPre);
085.// Perform action on click
086.btnPre.setOnClickListener(new View.OnClickListener() {
087.public void onClick(View v) {
088.currentPage = currentPage - 1;
089.ShowData();
090.}
091.});
092. 
093.// Show first load
094.ShowData();
095. 
096.}
097. 
098.public void ShowData()
099.{
100.btnNext.setEnabled(false);
101.btnPre.setEnabled(false);
102. 
103.setProgressBarIndeterminateVisibility(true);
104.new LoadContentFromServer().execute();
105.}
106. 
107. 
108.class LoadContentFromServer extends AsyncTask<Object, Integer, Object> {
109. 
110.@Override
111.protected Object doInBackground(Object... params) {
112. 
114. 
115.JSONArray data;
116.try {
117.data = new JSONArray(getJSONUrl(url));
118. 
119.MyArrList = new ArrayList<HashMap<String, Object>>();
120.HashMap<String, Object> map;
121. 
122./*
123.* TotalRows = Show for total rows
124.* TotalPage = Show for total page
125.*/
126. 
127.int displayPerPage = 9;   // Per Page
128.int TotalRows = data.length();
129.int indexRowStart = ((displayPerPage*currentPage)-displayPerPage);
130. 
131.if(TotalRows<=displayPerPage)
132.{
133.TotalPage =1;
134.}
135.else if((TotalRows % displayPerPage)==0)
136.{
137.TotalPage =(TotalRows/displayPerPage) ;
138.}
139.else
140.{
141.TotalPage =(TotalRows/displayPerPage)+1;
142.TotalPage = (int)TotalPage;
143.}
144.int indexRowEnd = displayPerPage * currentPage;
145.if(indexRowEnd > TotalRows)
146.{
147.indexRowEnd = TotalRows;
148.}
149. 
150.for(int i = indexRowStart; i < indexRowEnd; i++){
151.JSONObject c = data.getJSONObject(i);
152.map = new HashMap<String, Object>();
153.map.put("ImageID", (String)c.getString("ImageID"));
154.map.put("ItemID", (String)c.getString("ItemID"));
155. 
156.// Thumbnail Get ImageBitmap To Object
157.map.put("ImagePath", (String)c.getString("ImagePath"));
158.Bitmap newBitmap = loadBitmap(c.getString("ImagePath"));
159.map.put("ImagePathBitmap", newBitmap);
160. 
161.MyArrList.add(map);
162. 
163.publishProgress(i);
164. 
165.}
166. 
167. 
168.catch (JSONException e) {
169.// TODO Auto-generated catch block
170.e.printStackTrace();
171.}
172. 
173.return null;
174.}
175. 
176.@Override
177.public void onProgressUpdate(Integer... progress) {
178.imageAdapter.notifyDataSetChanged();
179.}
180. 
181.@Override
182.protected void onPostExecute(Object result) {
183. 
184.// Disabled Button Next
185.if(currentPage >= TotalPage)
186.{
187.btnNext.setEnabled(false);
188.}
189.else
190.{
191.btnNext.setEnabled(true);
192.}
193. 
194.// Disabled Button Previos
195.if(currentPage <= 1)
196.{
197.btnPre.setEnabled(false);
198.}
199.else
200.{
201.btnPre.setEnabled(true);
202.}
203. 
204.setProgressBarIndeterminateVisibility(false); // When Finish
205.}
206.}  
207. 
208. 
209.class ImageAdapter extends BaseAdapter {
210. 
211.private Context mContext;
212. 
213.public ImageAdapter(Context context) {
214.mContext = context;
215.}
216. 
217.public int getCount() {
218.return MyArrList.size();   
219.}
220. 
221.public Object getItem(int position) {
222.return MyArrList.get(position);
223.}
224. 
225.public long getItemId(int position) {
226.return position;
227.}
228. 
229.public View getView(int position, View convertView, ViewGroup parent) {
230.// TODO Auto-generated method stub
231. 
232.LayoutInflater inflater = (LayoutInflater) mContext
233..getSystemService(Context.LAYOUT_INFLATER_SERVICE);
234. 
235. 
236.if (convertView == null) {
237.convertView = inflater.inflate(R.layout.activity_column, null);
238.}
239. 
240.// ColPhoto
241.ImageView imageView = (ImageView) convertView.findViewById(R.id.ColPhoto);
242.imageView.getLayoutParams().height = 60;
243.imageView.getLayoutParams().width = 60;
244.imageView.setPadding(5555);
245.imageView.setScaleType(ImageView.ScaleType.CENTER_CROP);
246.try
247.{
248.imageView.setImageBitmap((Bitmap)MyArrList.get(position).get("ImagePathBitmap"));
249.catch (Exception e) {
250.// When Error
251.imageView.setImageResource(android.R.drawable.ic_menu_report_image);
252.}
253. 
254.// ColImageID
255.TextView txtImageID = (TextView) convertView.findViewById(R.id.ColImageID);
256.txtImageID.setPadding(5000);
257.txtImageID.setText("ID : " + MyArrList.get(position).get("ImageID").toString());   
258. 
259.// ColItemID
260.TextView txtItemID = (TextView) convertView.findViewById(R.id.ColItemID);
261.txtItemID.setPadding(5000);
262.txtItemID.setText("Item : " + MyArrList.get(position).get("ItemID").toString());   
263. 
264.return convertView;
265. 
266.}
267. 
268.}
269. 
270./*** Get JSON Code from URL ***/
271.public String getJSONUrl(String url) {
272.StringBuilder str = new StringBuilder();
273.HttpClient client = new DefaultHttpClient();
274.HttpGet httpGet = new HttpGet(url);
275.try {
276.HttpResponse response = client.execute(httpGet);
277.StatusLine statusLine = response.getStatusLine();
278.int statusCode = statusLine.getStatusCode();
279.if (statusCode == 200) { // Download OK
280.HttpEntity entity = response.getEntity();
281.InputStream content = entity.getContent();
282.BufferedReader reader = new BufferedReader(new InputStreamReader(content));
283.String line;
284.while ((line = reader.readLine()) != null) {
285.str.append(line);
286.}
287.else {
288.Log.e("Log""Failed to download file..");
289.}
290.catch (ClientProtocolException e) {
291.e.printStackTrace();
292.catch (IOException e) {
293.e.printStackTrace();
294.}
295.return str.toString();
296.}
297. 
298./***** Get Image Resource from URL (Start) *****/
299.private static final String TAG = "Image";
300.private static final int IO_BUFFER_SIZE = 4 1024;
301.public static Bitmap loadBitmap(String url) {
302.Bitmap bitmap = null;
303.InputStream in = null;
304.BufferedOutputStream out = null;
305. 
306.try {
307.in = new BufferedInputStream(new URL(url).openStream(), IO_BUFFER_SIZE);
308. 
309.final ByteArrayOutputStream dataStream = new ByteArrayOutputStream();
310.out = new BufferedOutputStream(dataStream, IO_BUFFER_SIZE);
311.copy(in, out);
312.out.flush();
313. 
314.final byte[] data = dataStream.toByteArray();
315.BitmapFactory.Options options = new BitmapFactory.Options();
316.//options.inSampleSize = 1;
317. 
318.bitmap = BitmapFactory.decodeByteArray(data, 0, data.length,options);
319.catch (IOException e) {
320.Log.e(TAG, "Could not load Bitmap from: " + url);
321.finally {
322.closeStream(in);
323.closeStream(out);
324.}
325. 
326.return bitmap;
327.}
328. 
329.private static void closeStream(Closeable stream) {
330.if (stream != null) {
331.try {
332.stream.close();
333.catch (IOException e) {
334.android.util.Log.e(TAG, "Could not close stream", e);
335.}
336.}
337.}
338. 
339.private static void copy(InputStream in, OutputStream out) throws IOException {
340.byte[] b = new byte[IO_BUFFER_SIZE];
341.int read;
342.while ((read = in.read(b)) != -1) {
343.out.write(b, 0, read);
344.}
345.}
346./***** Get Image Resource from URL (End) *****/
347. 
348.}


Screenshot

Android (ListView/GridView) get Result from Web Server and Paging Pagination

กำลังแสดงผลข้อมูลจาก Web Server บน GridView และมีการแบ่งหน้าการแสดงผลข้อมูล

Android (ListView/GridView) get Result from Web Server and Paging Pagination

ทดสอบคลิกที่ Next >> เพื่อไปหน้าถัดไป

Android (ListView/GridView) get Result from Web Server and Paging Pagination

กำลังโหลดหน้าข้อมูลหในหน้าอื่น ๆ 

Android (ListView/GridView) get Result from Web Server and Paging Pagination

สามารถคลิกเพื่อไปดูข้อมูลในหน้าต่าง ๆ ได้


เพิ่มเติม
วิธีนี้จะเป็นการติดต่อกับ Web Server เพียงครั้งเดียว ซึ่งจะเหมาะกับข้อมูลไม่มาก อาจจะอยู่ในหลัก สิบหรือร้อยรายการ แต่ถ้าข้อมูลมีมากกว่า พัน หมื่น หรือ แสนรายการ แนะนำให้ใช้วิธีนี้

Android Split Page Data (Next,Previous) result from PHP and MySQL


[출처] http://www.thaicreate.com/mobile/android-listview-gridview-get-result-from-web-server-and-paging-pagination.html

반응형

댓글()

버튼 이벤트 처리 (두가지 방법)

프로그래밍/Android (Java)|2015. 11. 3. 08:39
반응형

[ 첫번째 방법 ]


        Button btn_submit = (Button) v.findViewById(R.id.btn_submit);


        btn_submit.setOnClickListener(new Button.OnClickListener() {

            @Override

            public void onClick(View view) {

                // 내용 넣는곳

            }

        });


[ 두번째 방법 ]


        Button btn_sysdocu = (Button)findViewById(R.id.btn_sysdocu);

        Button btn_mp3 = (Button)findViewById(R.id.btn_mp3);

        Button btn_mp4 = (Button)findViewById(R.id.btn_mp4);


        View.OnClickListener listener = new View.OnClickListener() {

            @Override

            public void onClick(View v) {

                switch (v.getId()) {

                    case R.id.btn_sysdocu:

                        // 내용 넣는 곳

                        break;


                    case R.id.btn_mp3:

                        // 내용 넣는 곳

                        break;


                    case R.id.btn_mp4:

                        // 내용 넣는 곳

                        break;

                }

            }

        };


        btn_sysdocu.setOnClickListener(listener);

        btn_mp3.setOnClickListener(listener);

        btn_mp4.setOnClickListener(listener);

반응형

댓글()

안드로이드 버튼 숨기기

프로그래밍/Android (Java)|2015. 11. 3. 07:44
반응형

방법1

test.java 파일에서 수정


만약에 버튼아뒤가 bt1 = (Button) findbyViewId(R.id.bt01); << 이런식이라면

bt1.setVisibility(View.VISIBLE); // 화면에보임
bt1.settVisibility(View.INVISIBLE); // 화면에 안보임


방법2
test.xml 파일에서 수정


android:visibility="visible" << 버튼을 보이고 싶을때
android:visibility="invisible" << 버튼을 안보이고 싶을때(공간 차지함)

android:visibility="gone" << 버튼을 안보이고 싶을때(공간 차지하지않음)


[출처] http://blog.naver.com/PostView.nhn?blogId=junimohano&logNo=80126747520

반응형

댓글()

이미지 랜덤하게 출력하기 (ImageView)

프로그래밍/Android (Java)|2015. 10. 15. 13:50
반응형

activity_main.xml


<ImageView 
    android:id="@+id/SYSDOCU"
    android:layout_width="350dp"
    android:layout_height="160dp" />


MainActivity.java


package com.tistory.sysdocu;
import android.os.Bundle;
import android.app.Activity;
import android.widget.ImageView;
import android.graphics.drawable.Drawable;


public class MainActivity extends Activity {


        int[] images = new int[] {R.drawable.beautifulindonesia1, R.drawable.beautifulindonesia2, R.drawable.beautifulindonesia3, R.drawable.beautifulindonesia4, R.drawable.beautifulindonesia5};


@Override
protected void onCreate(Bundle savedInstanceState) {
super.onCreate(savedInstanceState);
setContentView(R.layout.activity_main);


        ImageView mImageView = (ImageView)findViewById(R.id.SYSDOCU);
        int imageId = (int)(Math.random() * images.length);
        mImageView.setBackgroundResource(images[imageId]);


        }


}


반응형

댓글()

CheckBox(체크박스) 이미지 변경하기

프로그래밍/Android (Java)|2015. 10. 14. 16:48
반응형

체크박스의 이미지 변경 ( selector 이용)


xml 파일을 새로 만들어준다. ( 본 포스팅에서는 checkbox.xml로 xml파일을 만들어줌 )


생성해준 xml파일은 drawable 폴더에다 해주었다.


셀렉터 생성

  1. <?xml version="1.0" encoding="utf-8"?>
  2. <selector xmlns:android="http://schemas.android.com/apk/res/android">
  3.     <item android:state_checked="false" android:drawable="@drawable/Checked가 false일 때, 이미지 파일" />
  4.     <item android:state_checked="true" android:drawable="@drawable/Checked가 true일 때, 이미지 파일" />
  5.     <item android:drawable="@drawable/기본 이미지, 보통 false 일 때의 이미지를 사용한다." />
  6. </selector>

그리고 체크박스를 사용할 xml / layout에 CheckBox 생성
  1. <CheckBox
  2.                android:id="@+id/checkBox"
  3.                android:layout_width="wrap_content"
  4.                android:layout_height="wrap_content"
  5.                android:textSize="16sp"
  6.                android:checked="true"
  7.                android:text="체크박스"
  8.                android:button="@null"
  9.                android:background="@android:color/transparent"
  10.                android:drawableLeft="@drawable/checkbox" />


android:drawableLeft="@drawable/checkbox"

이부분이 중요하다. 만들어준 셀렉터 파일명을 적어준다.


[출처] http://argument.tistory.com/72

반응형

댓글()

Activity 를 Dialog 처럼 띄우기

프로그래밍/Android (Java)|2015. 10. 14. 13:21
반응형

당연히 Dialog 처럼 띄울 Activity 는 layout 과 .java 를 만들어놔야 합니다.


AndroidManifest.xml 에서


 <activity

    android:name=".PopActivity"

    android:theme="@android:style/Theme.Dialog" />        <- Dialog 처럼 띄우기 (주변은 불투명 처리됩니다)


PopActivity.java 에서


package com.sysdocu.test;


import android.os.Bundle;

import android.app.Activity;

import android.view.Window;


public class PopActivity extends Activity {


        @Override

        protected void onCreate(Bundle savedInstanceState) {

        super.onCreate(savedInstanceState);

        requestWindowFeature(Window.FEATURE_NO_TITLE);    <- 타이틀바 없앰 (반드시 setContentView 이전에 사용)

        setContentView(R.layout.activity_pop);

        this.setFinishOnTouchOutside(false);                            <- Dialog 이외의 영역에 터치시 화면 종료 안함 (반드시 setContentView 이후에 사용)


        }

}


Dialog 사이즈를 조절하려면


activity_pop.xml

<LinearLayout xmlns:android="http://schemas.android.com/apk/res/android"

    xmlns:tools="http://schemas.android.com/tools"

    android:layout_width="fill_parent"

    android:layout_height="fill_parent"

    android:minWidth="600dp"        <-- 가로 사이즈

    android:minHeight="400dp"       <-- 세로 사이즈 

    android:background="#12193a"

    android:gravity="center"

    android:orientation="vertical" >


반응형

댓글()

XML 파싱 ( DOM Parser ) ( AsyncTask 클래스 사용 )

프로그래밍/Android (Java)|2015. 10. 14. 10:43
반응형

참고 링크 


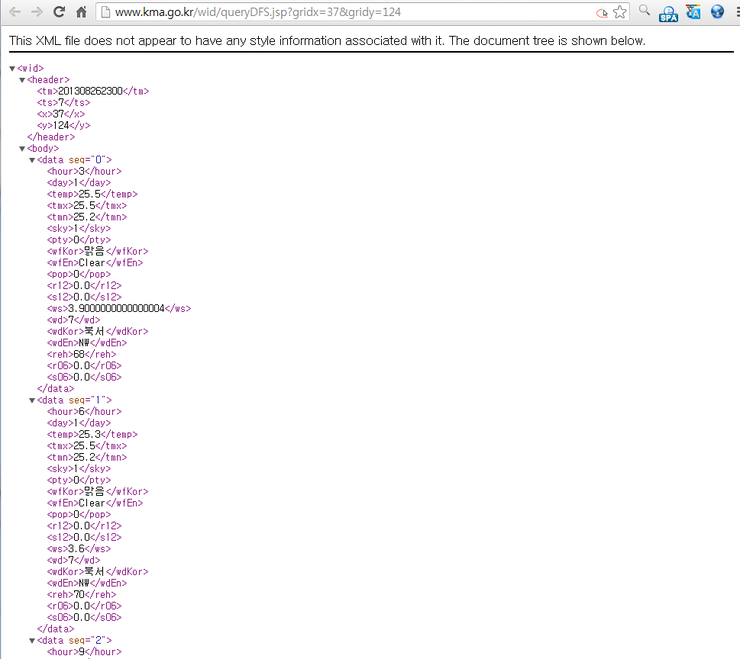
날씨 정보 RSS 서비스 페이지 (기사청) : http://www.kma.go.kr/weather/lifenindustry/sevice_rss.jsp 

날씨 정보 RSS (기사청 : 서울) http://www.kma.go.kr/weather/forecast/mid-term-xml.jsp?stnId=108 

공공데이터 포털 : 공공데이터 포털 기상청 Open API 사이트


샘플 URL : http://www.kma.go.kr/wid/queryDFS.jsp?gridx=61&gridy=125


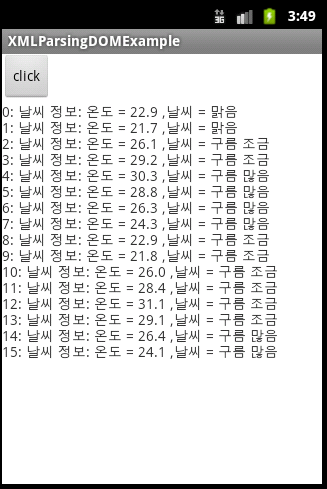
예제) 기상청에서 제공하는 날씨정보 (xml) 를 파싱하여 출력하는 예제 


 [코드]

activity_xmlparsing_domexample.xml

1
2
3
4
5
6
7
8
9
10
11
12
13
14
15
16
17
18
19
20
21
<?xml version="1.0" encoding="utf-8"?>
<LinearLayout xmlns:android="http://schemas.android.com/apk/res/android"
    android:orientation="vertical"
    android:layout_width="fill_parent"
    android:layout_height="fill_parent"
    >


<Button
    android:id="@+id/button1"
    android:layout_width="wrap_content"
    android:layout_height="wrap_content"
    android:onClick="onClick"
    android:text="click" />


<TextView
    android:id="@+id/textView1"
    android:layout_width="fill_parent"
    android:layout_height="match_parent"
    android:text="" />


</LinearLayout>

AndroidManifest.xml

1
2
3
4
5
6
7
8
9
10
11
12
13
14
15
16
17
18
19
20
21
22
23
24
25
26
27
28
<?xml version="1.0" encoding="utf-8"?>
<manifest xmlns:android="http://schemas.android.com/apk/res/android"
    package="com.example.xmlparsingdomexample"
    android:versionCode="1"
    android:versionName="1.0" >


    <uses-sdk
        android:minSdkVersion="8"
        android:targetSdkVersion="17" />

    <!-- 인터넷 접속 허용 -->
    <uses-permission android:name="android.permission.INTERNET"/>
    
    <application
        android:allowBackup="true"
        android:icon="@drawable/ic_launcher"
        android:label="@string/app_name"
        android:theme="@style/AppTheme" >

        <activity
            android:name="com.example.xmlparsingdomexample.XMLParsingDOMExample"
            android:label="@string/app_name" >

            <intent-filter>
                <action android:name="android.intent.action.MAIN" />

                <category android:name="android.intent.category.LAUNCHER" />
            </intent-filter>
        </activity>
    </application>
</manifest>

XMLParsingDOMExample.java

1
2
3
4
5
6
7
8
9
10
11
12
13
14
15
16
17
18
19
20
21
22
23
24
25
26
27
28
29
30
31
32
33
34
35
36
37
38
39
40
41
42
43
44
45
46
47
48
49
50
51
52
53
54
55
56
57
58
59
60
61
62
63
64
65
66
67
68
69
70
71
72
73
74
75
76
77
78
79
80
81
82
83
84
85
86
87
88
89
90
91
92
93
94
95
96
97
98
99
package com.example.xmlparsingdomexample;

import java.net.URL;

import javax.xml.parsers.DocumentBuilder;
import javax.xml.parsers.DocumentBuilderFactory;

import org.w3c.dom.Document;
import org.w3c.dom.Element;
import org.w3c.dom.Node;
import org.w3c.dom.NodeList;
import org.xml.sax.InputSource;

import android.app.Activity;
import android.os.AsyncTask;
import android.os.Bundle;
import android.view.View;
import android.widget.LinearLayout;
import android.widget.TextView;
import android.widget.Toast;

public class XMLParsingDOMExample extends Activity {

    
    TextView textview;
    Document doc = null;
    LinearLayout layout = null;
    
    @Override
    protected void onCreate(Bundle savedInstanceState) {
        super.onCreate(savedInstanceState);
        setContentView(R.layout.activity_xmlparsing_domexample);
        
        textview = (TextView) findViewById(R.id.textView1);
        
    }
    
    public void onClick(View view){
        GetXMLTask task = new GetXMLTask();
        task.execute("http://www.kma.go.kr/wid/queryDFS.jsp?gridx=61&gridy=125");
        
    }


    //private inner class extending AsyncTask
    private class GetXMLTask extends AsyncTask<String, Void, Document>{    
        
        @Override
        protected Document doInBackground(String... urls) {
            URL url;
            try {
                url = new URL(urls[0]);
                DocumentBuilderFactory dbf = DocumentBuilderFactory.newInstance();
                DocumentBuilder db = dbf.newDocumentBuilder(); //XML문서 빌더 객체를 생성
                doc = db.parse(new InputSource(url.openStream())); //XML문서를 파싱한다.
                doc.getDocumentElement().normalize();
                
            } catch (Exception e) {
                Toast.makeText(getBaseContext(), "Parsing Error", Toast.LENGTH_SHORT).show();
            }
            return doc;
        }
        
        @Override
        protected void onPostExecute(Document doc) {
            
            String s = "";
            //data태그가 있는 노드를 찾아서 리스트 형태로 만들어서 반환
            NodeList nodeList = doc.getElementsByTagName("data"); 
            //data 태그를 가지는 노드를 찾음, 계층적인 노드 구조를 반환
            
            for(int i = 0; i< nodeList.getLength(); i++){
                
                //날씨 데이터를 추출
                s += "" +i + ": 날씨 정보: ";
                Node node = nodeList.item(i); //data엘리먼트 노드
                Element fstElmnt = (Element) node;
                NodeList nameList  = fstElmnt.getElementsByTagName("temp");
                Element nameElement = (Element) nameList.item(0);
                nameList = nameElement.getChildNodes();
                s += "온도 = "+ ((Node) nameList.item(0)).getNodeValue() +" ,";
                
                
                NodeList websiteList = fstElmnt.getElementsByTagName("wfKor");
                //<wfKor>맑음</wfKor> =====> <wfKor> 태그의 첫번째 자식노드는 TextNode 이고 TextNode의 값은 맑음
                s += "날씨 = "+  websiteList.item(0).getChildNodes().item(0).getNodeValue() +"\n";
                
                
            }
            
            textview.setText(s);
            
            super.onPostExecute(doc);
        }
        
        
    }//end inner class - GetXMLTask     
}


xml 내용 일부.


[출처http://m.blog.naver.com/javaking75/140196029200


XMLParsingDOMExample.zip


반응형

댓글()

DB연동 - XML 파싱을 이용한 Mysql 연동

프로그래밍/Android (Java)|2015. 10. 8. 17:15
반응형

방학하고나서 레퍼런스폰에만 돌아가던것을 고치기 위해 파싱을 이용한 방법을 공부했다.

JSP로 할까 PHP로 할까 고민했었는데

내컴엔 APM이 깔려있어서 그냥 PHP로 했다.(사실 간단한거라면 PHP가 JSP보다 쉬운거 같으니까 PHP로 했다.)


이렇게 이름과 가격을 입력하고 입력버튼을 누르면 웹서버에 있는 Mysql DB에 저장이 된다.


그러고 나서 찾기를 누르면 DB에 저장되어있던 값이 나온다.


인터넷에 있는 방식은 어려워보였지만

PHP를 할줄 아는사람에게는 어렵지 않다.(PHP를 기본밖에 모르는 나도 했으니 ㅋ)


일단 SQLite 방식은 내 아트릭스에서 안돌아갔지만

이 파싱방식은 내 아트릭스에서 돌아가는것을 확인할 수 있었다.


안드로이드와 Mysql을 연동시키는 방법은 이렇다.


안드로이드가 서버에 있는 php나 jsp 파일을 넘길 인자값을 넣어 실행한다.

실행된 php나 jsp 파일은 받은 인자값을 이용해 DB에 접근하고 쿼리 결과를 xml 파일에 저장한다.

안드로이드는 다시 서버에 있는 xml파일을 열고 xml파서를 이용해 쿼리 결과를 받는다.


좀 복잡해 보일 수도 있겠지만

직접 해보면 어려운건 아니다.


일단 내 소스는

PHP는 내가 스스로 공부한것을 바탕으로 했고

XML 파싱하는 방법은

단계별 예제로 배우는 안드로이드 프로그래밍

이 책을 참고하였다.


쨌든 본론 들어가겠다.


아파치 서버에 DB와 테이블을 만든다.

난 DB 이름을 bookdb로 했고

테이블 이름은 books로 했다.


테이블 모양은 이렇다.


이제 코딩을 하겠다.

먼저 DB에 입력하기 위한 과정이다.


일단 PHP파일을 작성한다.

PHP파일 이름은 대충 insert.php로 정했다.

소스는 이렇다.


1
2
3
4
5
6
7
8
9
10
11
12
13
14
15
16
17
18
19
<!--?
$connect = mysql_connect("127.0.0.1", "root", "0000"); //DB가 있는 주소(이것은 웹서버로 직접 접속하는 것이기 때문에 루프백 주소를 써도 됨)
mysql_selectdb("bookdb"); //DB 선택
mysql_query("set names utf8"); //이것 또한 한글(utf8)을 지원하기 위한 것
 
$name = $_REQUEST[name]; //주소에 있는 name값을 받아 name 변수에 저장
$price = $_REQUEST[price]; //주소에 있는 price값을 받아 prica 변수에 저장
 
$qry = "insert into books(name, price) values('$name', $price);";
$result = mysql_query($qry);
 
$xmlcode = "<?xml version = \"1.0\" encoding = \"utf-8\"?-->\n"; //xml파일에 출력할 코드
$xmlcode .= "<result>$result</result>\n"; //DB insert가 성공적으로 됐는지 여부를 확인하기 위해 result값을 xml로 출력시킴
 
$dir = "C:/APM_Setup/htdocs/Books"; //insertresult.xml 파일을 저장할 경로
$filename = $dir."/insertresult.xml";
 
file_put_contents($filename, $xmlcode); //xmlcode의 내용을 xml파일로 출력
?>

다음은 검색버튼을 눌렀을때 검색 결과가 나오게 할 PHP파일이다.

이름은 대충 search.php로 정했다.

소스는 아래와 같다.


1
2
3
4
5
6
7
8
9
10
11
12
13
14
15
16
17
18
19
20
21
22
23
24
25
26
<!--?
$connect = mysql_connect("127.0.0.1", "root", "0000"); //DB가 있는 주소(이것은 웹서버로 직접 접속하는 것이기 때문에 루프백 주소를 써도 됨)
mysql_selectdb("bookdb"); //DB 선택
mysql_query("set names utf8"); //이것 또한 한글(utf8)을 지원하기 위한 것
 
$qry = "select * from books;";
$result = mysql_query($qry);
 
$xmlcode = "<?xml version = \"1.0\" encoding = \"utf-8\"?-->\n"; //xml파일에 출력할 코드
 
while($obj = mysql_fetch_object($result))
{
    $name = $obj->name;
    $price = $obj->price;
 
    $xmlcode .= "<node>\n";
    $xmlcode .= "<name>$name</name>\n";
    $xmlcode .= "<price>$price</price>\n";
    $xmlcode .= "</node>\n"; //DB쿼리로 받아낸 name과 price값을 xml파일에 출력하기 위한 코드
}
 
$dir = "C:/APM_Setup/htdocs/Books"; //searchresult.xml 파일을 저장할 경로
$filename = $dir."/searchresult.xml";
 
file_put_contents($filename, $xmlcode); //xmlcode의 내용을 xml파일로 출력
?>

이제 마지막으로 안드로이드를 작성할 차례이다.

먼저 통신을 해야하기 때문에 매니페스트 파일을 만져줘야 한다.

인터넷 퍼미션을 등록해야하기 때문이다.


매니페스트 파일 소스는 이렇다.


1
2
3
4
5
6
7
8
9
10
11
12
13
14
15
16
17
<!--?xml version="1.0" encoding="utf-8"?-->
<manifest xmlns:android="http://schemas.android.com/apk/res/android" package="gong.mille.books" android:versioncode="1" android:versionname="1.0">
 
    <uses-sdk android:minsdkversion="8">
    <uses-permission android:name="android.permission.INTERNET">
 
    <application android:icon="@drawable/ic_launcher" android:label="@string/app_name">
        <activity android:name=".Android_BookActivity" android:label="@string/app_name">
            <intent-filter>
                <action android:name="android.intent.action.MAIN">
 
                <category android:name="android.intent.category.LAUNCHER">
            </category></action></intent-filter>
        </activity>
    </application>
 
</uses-permission></uses-sdk></manifest>

다음은 레이아웃을 손대겠다.

레이아웃은 main.xml 하나밖에 없고 소스는 대락 이렇다.


1
2
3
4
5
6
7
8
9
10
11
12
13
14
15
16
17
18
19
20
21
22
23
24
25
<!--?xml version="1.0" encoding="utf-8"?-->
<linearlayout xmlns:android="http://schemas.android.com/apk/res/android" android:layout_width="fill_parent" android:layout_height="fill_parent" android:orientation="vertical">
 
    <textview android:layout_width="fill_parent" android:layout_height="wrap_content" android:text="@string/hello">
 
    <edittext android:id="@+id/editText1" android:layout_width="match_parent" android:layout_height="wrap_content" android:ems="10">
 
        <requestfocus>
    </requestfocus></edittext>
 
    <linearlayout android:layout_width="match_parent" android:layout_height="wrap_content">
 
        <edittext android:id="@+id/editText2" android:layout_width="wrap_content" android:layout_height="wrap_content" android:layout_weight="1" android:ems="10" android:inputtype="number">
 
        <button android:id="@+id/button1" android:layout_width="wrap_content" android:layout_height="wrap_content" android:layout_weight="1" android:text="입력">


    </button><button android:id="@+id/button2" android:layout_width="match_parent" android:layout_height="wrap_content" android:text="찾기">
 
    <listview android:id="@+id/listView1" android:layout_width="match_parent" android:layout_height="wrap_content">
    </listview>
 
 
</button></edittext></linearlayout></textview></linearlayout>

마지막으로 자바파일을 손대야 한다.

자바파일 소스는 밑에 있다.


1
2
3
4
5
6
7
8
9
10
11
12
13
14
15
16
17
18
19
20
21
22
23
24
25
26
27
28
29
30
31
32
33
34
35
36
37
38
39
40
41
42
43
44
45
46
47
48
49
50
51
52
53
54
55
56
57
58
59
60
61
62
63
64
65
66
67
68
69
70
71
72
73
74
75
76
77
78
79
80
81
82
83
84
85
86
87
88
89
90
91
92
93
94
95
96
97
98
99
100
101
102
103
104
105
106
107
108
109
110
111
112
113
114
115
116
117
118
119
120
121
122
123
124
125
126
127
128
129
130
131
132
133
134
135
136
137
138
139
140
141
142
143
144
145
146
147
148
149
150
151
152
153
154
155
156
157
158
159
160
161
162
163
164
165
166
167
168
169
170
171
172
173
174
175
176
177
178
179
180
181
182
183
184
185
186
187
188
189
190
191
192
193
194
195
196
197
198
199
200
201
202
203
204
package gong.mille.books;
 
import java.io.InputStream;
import java.net.URL;
import java.net.URLEncoder;
import java.util.ArrayList;
 
import org.xmlpull.v1.XmlPullParser;
import org.xmlpull.v1.XmlPullParserFactory;
 
import android.app.Activity;
import android.app.ProgressDialog;
import android.os.Bundle;
import android.os.Handler;
import android.util.Log;
import android.view.View;
import android.widget.ArrayAdapter;
import android.widget.Button;
import android.widget.EditText;
import android.widget.ListView;
import android.widget.Toast;
 
public class Android_BookActivity extends Activity {
    private final String SERVER_ADDRESS = "http://127.0.0.1/Books"; //서버 주소(php파일이 저장되어있는 경로까지, 절대로 127.0.0.1이나 localhost를 쓰면 안된다!! 그러므로 아이피는 자기 아이피로.....)
     
    EditText edtname;
    EditText edtprice;
    Button btninsert;
    Button btnsearch;
     
    ListView list;
    ArrayList<string> data;
    ArrayAdapter<string> adapter;
     
    /** Called when the activity is first created. */
    @Override
    public void onCreate(Bundle savedInstanceState) {
        super.onCreate(savedInstanceState);
        setContentView(R.layout.main);
         
        edtname = (EditText )findViewById(R.id.editText1);
        edtprice = (EditText )findViewById(R.id.editText2);
        btninsert = (Button )findViewById(R.id.button1);
        btnsearch = (Button )findViewById(R.id.button2);
         
        list = (ListView )findViewById(R.id.listView1);
        data = new ArrayList<string>();
        adapter = new ArrayAdapter<string>(this,
                android.R.layout.simple_list_item_1, data);
        list.setAdapter(adapter);
         
        btninsert.setOnClickListener(new View.OnClickListener() { //입력 버튼을 눌렀을 때
             
            public void onClick(View v) {
                // TODO Auto-generated method stub
                 
                if( edtname.getText().toString().equals("") ||
                        edtprice.getText().toString().equals("") ) { //이름이나 가격중에 하나라도 입력이 안돼있을때
                    Toast.makeText(Android_BookActivity.this,
                            "이름이나 가격을 입력하세요", Toast.LENGTH_SHORT).show();
                    return;
                }
                     
                    runOnUiThread(new Runnable() {
                         
                        public void run() {
                            // TODO Auto-generated method stub
                            String name = edtname.getText().toString();
                            String price = edtprice.getText().toString();
                             
                            try {
                                URL url = new URL(SERVER_ADDRESS + "/insert.php?"
                                        + "name=" + URLEncoder.encode(name, "UTF-8")
                                        + "&price=" + URLEncoder.encode(price, "UTF-8")); //변수값을 UTF-8로 인코딩하기 위해 URLEncoder를 이용하여 인코딩함
                                url.openStream(); //서버의 DB에 입력하기 위해 웹서버의 insert.php파일에 입력된 이름과 가격을 넘김
                                 
                                String result = getXmlData("insertresult.xml", "result"); //입력 성공여부
                                 
                                if(result.equals("1")) { //result 태그값이 1일때 성공
                                    Toast.makeText(Android_BookActivity.this,
                                            "DB insert 성공", Toast.LENGTH_SHORT).show();
                                     
                                    edtname.setText("");
                                    edtprice.setText("");
                                }
                                else //result 태그값이 1이 아닐때 실패
                                    Toast.makeText(Android_BookActivity.this,
                                            "DB insert 실패", Toast.LENGTH_SHORT).show();
                            } catch(Exception e) {
                                Log.e("Error", e.getMessage());
                            }
                        }
                    });
                }
            });
         
        btnsearch.setOnClickListener(new View.OnClickListener() {
             
            public void onClick(View arg0) {
                 
                // TODO Auto-generated method stub
                final Handler handler = new Handler();
                runOnUiThread(new Runnable() {
                     
                    public void run() {
                        // TODO Auto-generated method stub
                        final ProgressDialog dialog = ProgressDialog.show(
                                Android_BookActivity.this,
                                "불러오는중.....", "잠시만 기다려주세요.");
                         
                        handler.post(new Runnable() {
                             
                            public void run() {
                                // TODO Auto-generated method stub
                                try {
                                    data.clear(); //반복적으로 누를경우 똑같은 값이 나오는 것을 방지하기 위해 data를 클리어함
                                    URL url = new URL(SERVER_ADDRESS + "/search.php");
                                    url.openStream(); //서버의 serarch.php파일을 실행함
                         
                                    ArrayList<string> namelist = getXmlDataList("searchresult.xml", "name");//name 태그값을 읽어 namelist 리스트에 저장
                                    ArrayList<string> pricelist = getXmlDataList("searchresult.xml", "price"); //price 태그값을 읽어 prica 리스트에 저장
                                     
                                    if(namelist.isEmpty())
                                        data.add("아무것도 검색되지 않았습니다.");
                                    else {
                                        for(int i = 0; i < namelist.size(); i++) {
                                            String str = namelist.get(i) + " - " + pricelist.get(i);
                                            data.add(str);
                                        }
                                    }
                                } catch(Exception e) {
                                    Log.e("Error", e.getMessage());
                                } finally{
                                    dialog.dismiss();
                                    adapter.notifyDataSetChanged();
                                }
                            }
                        });
                    }
                });
                 
            }
        });
    }
     
    private String getXmlData(String filename, String str) { //태그값 하나를 받아오기위한 String형 함수
        String rss = SERVER_ADDRESS + "/";
        String ret = "";
         
        try { //XML 파싱을 위한 과정
            XmlPullParserFactory factory = XmlPullParserFactory.newInstance();
            factory.setNamespaceAware(true);
            XmlPullParser xpp = factory.newPullParser();
            URL server = new URL(rss + filename);
            InputStream is = server.openStream();
            xpp.setInput(is, "UTF-8");
             
            int eventType = xpp.getEventType();
             
            while(eventType != XmlPullParser.END_DOCUMENT) {
                if(eventType == XmlPullParser.START_TAG) {
                    if(xpp.getName().equals(str)) { //태그 이름이 str 인자값과 같은 경우
                        ret = xpp.nextText();
                    }
                }
                eventType = xpp.next();
            }
        } catch(Exception e) {
            Log.e("Error", e.getMessage());
        }
         
        return ret;
    }
     
    private ArrayList<string> getXmlDataList(String filename, String str) { //태그값 여러개를 받아오기위한 ArrayList<string>형 변수
        String rss = SERVER_ADDRESS + "/";
        ArrayList<string> ret = new ArrayList<string>();
         
        try { //XML 파싱을 위한 과정
            XmlPullParserFactory factory = XmlPullParserFactory.newInstance();
            factory.setNamespaceAware(true);
            XmlPullParser xpp = factory.newPullParser();
            URL server = new URL(rss + filename);
            InputStream is = server.openStream();
            xpp.setInput(is, "UTF-8");
             
            int eventType = xpp.getEventType();
             
            while(eventType != XmlPullParser.END_DOCUMENT) {
                if(eventType == XmlPullParser.START_TAG) {
                    if(xpp.getName().equals(str)) { //태그 이름이 str 인자값과 같은 경우
                        ret.add(xpp.nextText());
                    }
                }
                eventType = xpp.next();
            }
        } catch(Exception e) {
            Log.e("Error", e.getMessage());
        }
         
        return ret;
    }
}
</string></string></string></string></string></string></string></string></string></string>

이렇게 하면 웹서버의 Mysql과 안드로이드가 잘 연동될 것이다.

이렇게 쉬울줄 몰랐는데

직접 해보니 할만했다 ㅋ

저번학기때 프로젝트 했던것을 공모전에 내기로 했는데

이것으로 싹 고쳐야했다.

그래도 SQLite를 쓰는것보단 간단한 소스라 금방 고칠수 있었다.

이제 버그 테스트를 하고 버그수정 하는 일밖에 남지 않았다.

다음은 뭘 올려야할지 모르겠지만

공부하다가 도움될만한 것 찾게되면 올려야겠다.


P.S

DB에 한글이 깨지는것을 막기 위해서 utf-8로 인코딩 했는데도 안된다면 PHP파일에 HTML 명령어를 넣어야 한다.

<head>

<meta http-equiv = "content-Type" content = "text/html" charset = "utf-8">

</head>

이 명령어를 넣어야 하는데 PHP파일 맨 앞에다가 넣어주면 된다.


요렇게 ㅋ


[출처] http://gongmille.tistory.com/5

[소스] http://gongmille.tistory.com/6


mysql - 안드로이드 연동_소스.zip


반응형

댓글()

videoview streaming android example

프로그래밍/Android (Java)|2015. 10. 6. 14:12
반응형

http://www.androidbegin.com/tutorial/android-video-streaming-videoview-tutorial/


VideoStreamTutorial.rar


반응형

댓글()